Timed Text Editor
The Timed Text Editor Widget
Provides a comprehensive set of functions for viewing, editing and authoring single or multi language subtitle and caption files as well as AD and Dubbing scripts and timed metadata files.
Other timed text types can also be displayed including comments, transcripts, compliance metadata, edit list data etc. and multiple files can be loaded at the same time.
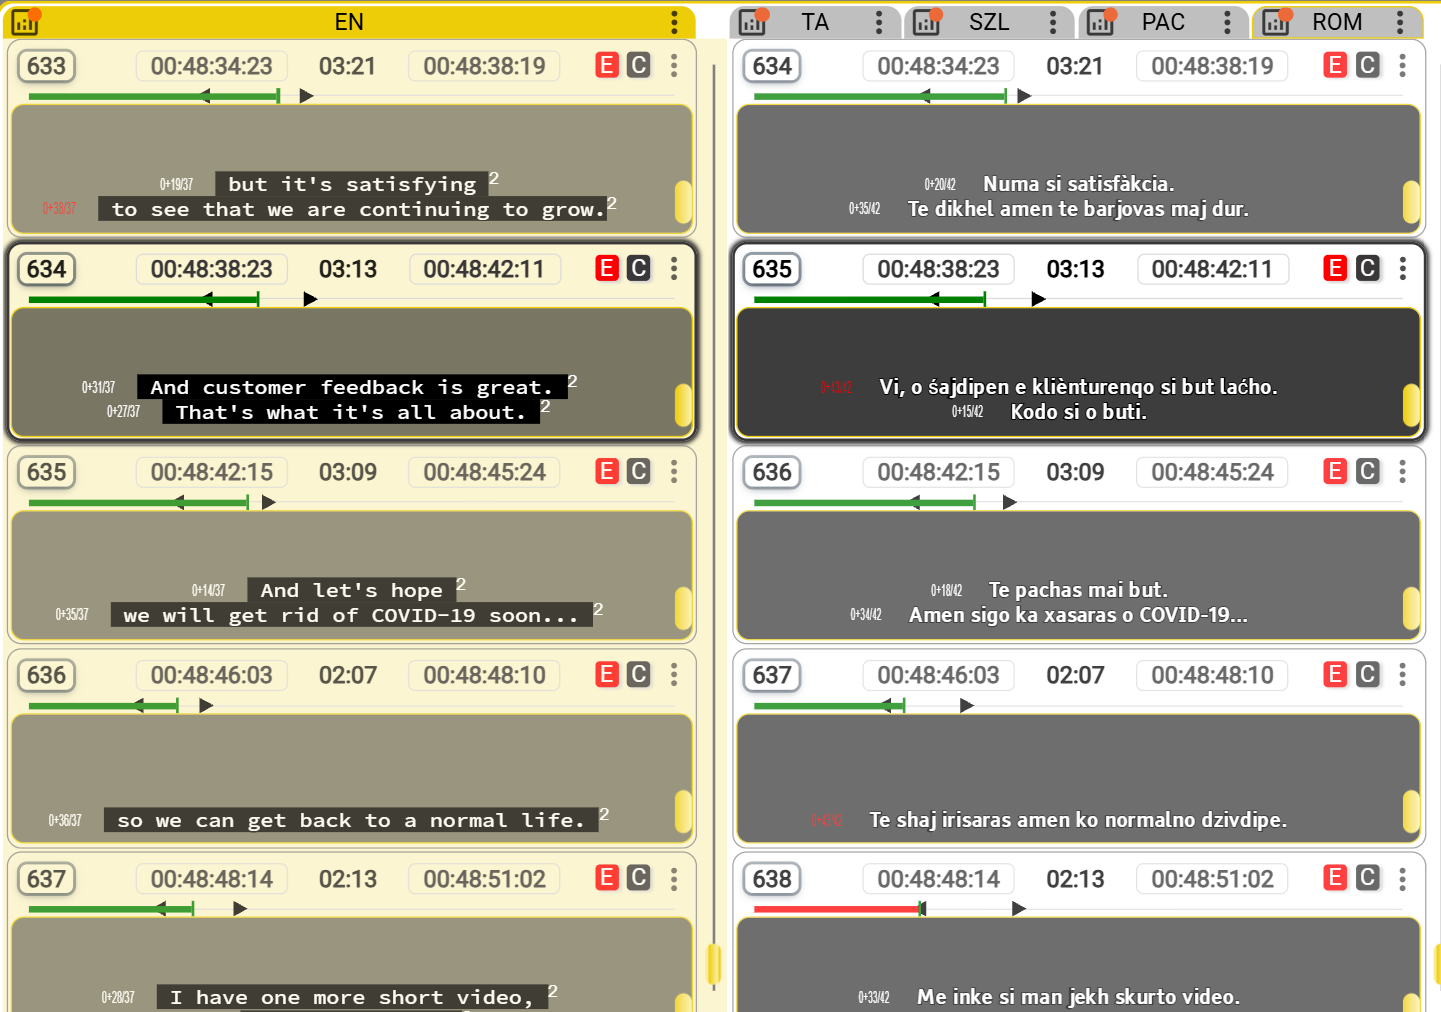
The time text editor is arranged in columns, there can be anything from one to four visible columns and the right-hand column can be tabbed to support more files. There is no upper limit to the number of files that can be loaded into a task.
The active column and tab for editing is indicated by a yellow highlight on the tab.
The current tab in a multi tab column is indicated by a grey highlight if it is not the active column for editing.
In Rehearse Mode the active column (for text overlays) is indicated by a yellow highlight for the whole column.
Columns
Each column is associated with a text – see the Files in Stellar section. In addition each column can be restricted in the level of edit access that is allowed.
Changing the column layout
The widget can be configured to show between one and four columns, the right hand column may have up to four tabs.
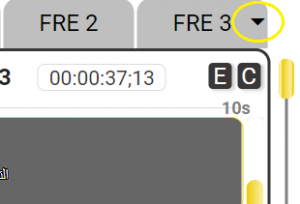
Additional files, if present in the Task, can be brought into view by using a drop down selector on the fourth tab.
To change the number of columns, up to a maximum of four or the number of text files loaded (whichever is fewer) drag columns to or from the right hand column. As you start to drag a column a space will open up where it can be dropped.
To re-order columns drag a column and drop it onto an existing column to replace it. The replaced column will move to the last column, end tab position.
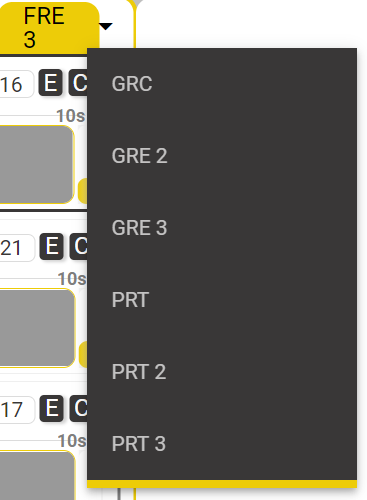
To select a text file that are not currently in view use the drop down list from the last tab. The selected file will appear in the last tab, displacing the current file.
Editing the column Name
Clicking on the name in the column tab allows you to edit the name.
This name is just for display, but must be unique, and the same name is used on the row on the timeline.
You can also edit it in the File Status screen or the Project Properties screen.
File Types
Different file types will be displayed differently in the time text editor.
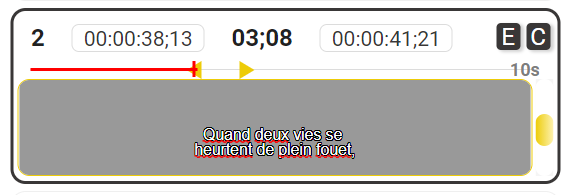
**Subtitle and caption files **
**AD and dubbing scripts **
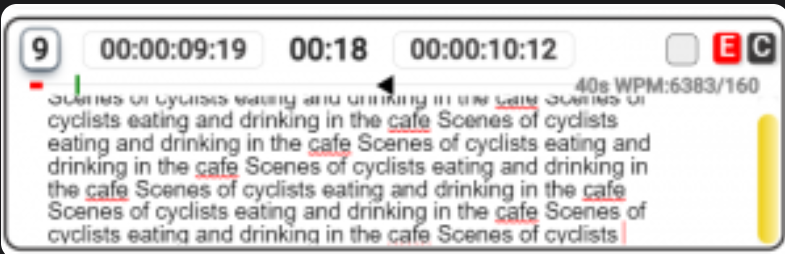
**Timed metadata files **

Text display modes
For subtitle and caption files you can just select between a number of different display modes. This will impact how subtitles you see on the screen and the information available
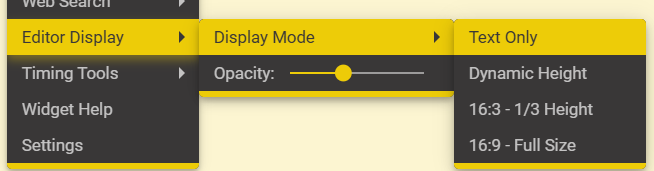
Either right-click in the text editor and select Editor Display Mode, or go to the text editor settings menu.
You can now select from one of four modes:
- Text only - just displays the text with no horizontal or vertical positioning information.
- Dynamic height - displays horizontal positioning information and the height of the box is determined by the number of rows.
- 16:3 - represents one-third of a standard 16:3 video image with a vertical scroll bar to show vertical positioning in the full screen height.
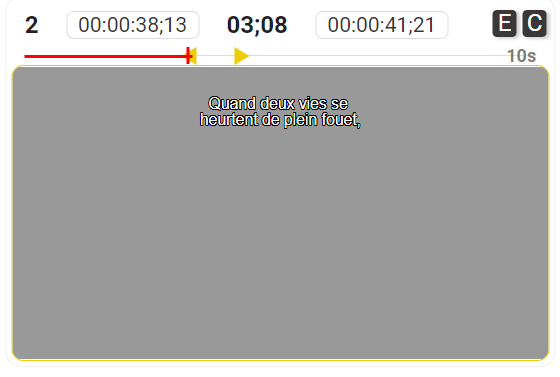
- 16:9 - represents a full 16:9 video image with the text in the correct position.
You can select which option you prefer and store this as part of your layout.
Vertical Positioning
Subtitles and Captions can be moved to different vertical positions, for a full list of controls see the Hotkeys page.
The vertical position of a subtitle is shown in the editor box by the scroll bar in each box.
The scroll position will always automatically adjust to show any text. Here the text is at the bottom of the screen.
Here the text is in the middle of the screen.
Here the text is at the top of the screen.
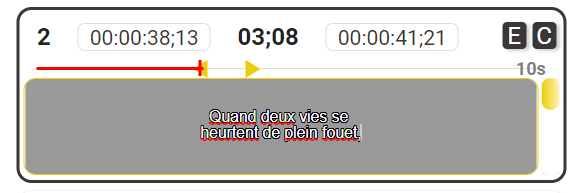
Text for the selected subtitle will also be shown over the video in the correct horizontal and vertical position (if enabled).
Another way of viewing the vertical positioning of text is to switch the text box from 16:3 to 16:9 mode. See above.
This will display a full screen size box with the text in the configured location. No scroll bar is displayed in this mode.
- Use this mode if yo need to display vertical style (Japanese) subtitles.
Accessing the File Status Display window -
File QC Icons
| Icon | Description |
|---|---|
 | Comments |
 | Errors |
 | Warnings |
 | Approved Check Box |
 | Audio Recording Status |
**
**
Comments
Comments can be added to each individual subtitle (caption, AD script line, dubbing Script Line etc.)
Subtitle comments are only supported in some file types. Where supported, the comments are included in the subtitle file and will move with the file. If the subtitle file is opened in a different Task the comments will be visible.
To add a comment to a subtitle click on the C icon in the top right corner of the Subtitle box.
Action Hotkey = Ctrl+Q.
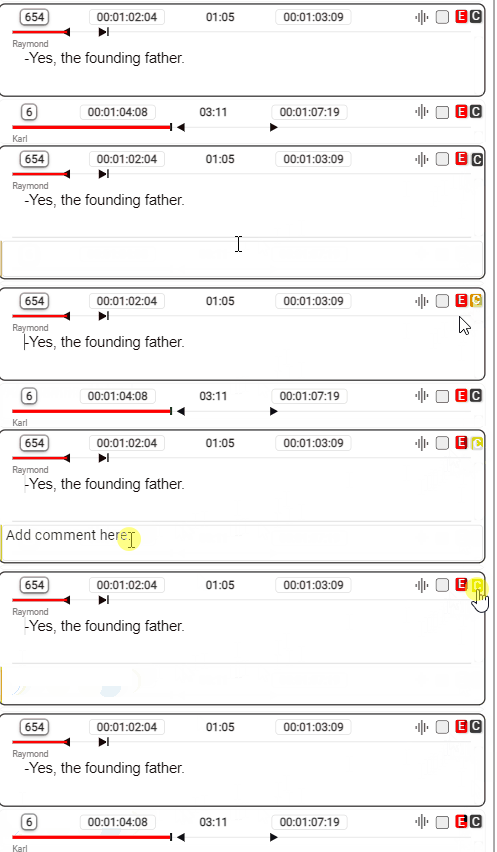
A field will expand bellow the chosen subtitle. You can input the any type of comment you wish.
- Subtitle has comment
 .- Subtitle does not have a comment
Errors and Warnings
If a subtitle contains an error or a warning, the E or W icon will change color accordingly.
Yellow W = Title contains only warnings
Red E = Title contains errors and may contain warnings
No Icon = No errors/warnings

You can see basic details by hovering over the icon.
For full details about the Errors/Warnings present in a subtitle clicki on the E or W icon. This will open the QC results box.
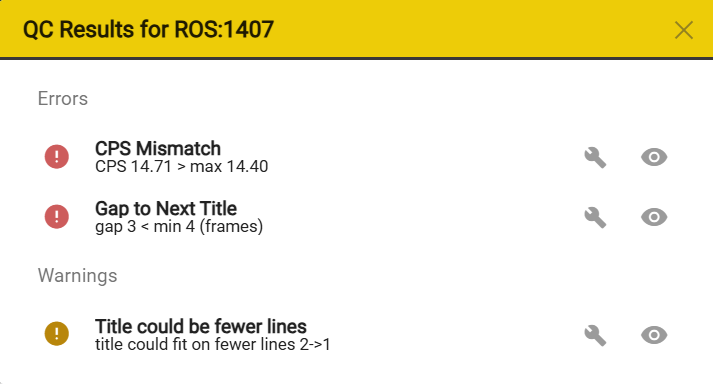
See the QC page for more information on file QC.### Link to file status page. ???
Hint: you can leave this box open and when you click on the E button for a different title, the QC results will update to show those for the new title.
Approved Check Box - is present in each title box if the loaded file is an AD or dubbing script. It is used during the QC process to mark titles that have been QCed. Subtitles marked as approved, will be reported in the File Status window.
Hint: You can leave the File Status window open and still be able to mark titles as approved, but it will take about 5 seconds for the File Status window to update.
Audio Recording Status - Is present only together with AD and Dubbing files. In these cases, when at least one associated audio is present and is unmuted, the Audio Recording Icon will appear.
No Audio Recording Icon means that the current Title does not have any audio associated, or that the associated audio is present but is muted.
Context Menus
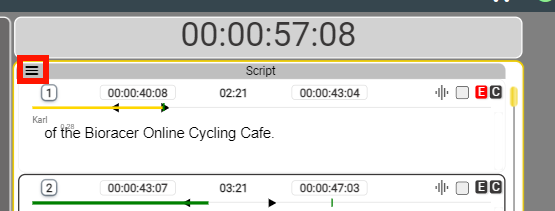
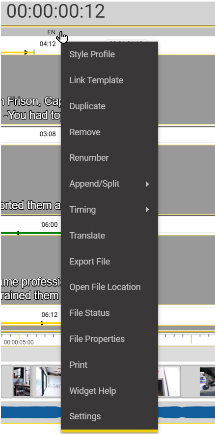
Context menus are displayed by right clicking inside the Widget area or on the three dots in each section. There are several context menus based on the area that is clicked.
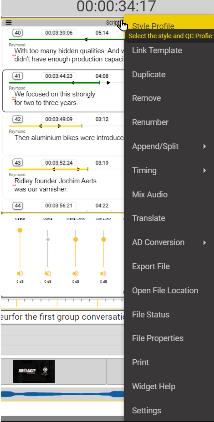
| Column Title with AD/Dubb File | Column Title with Subtitle File |
|---|---|
 |  |
| Option | Description |
|---|---|
| Style Profile | Set or change the Style and QC Profile selected for this text file. |
| Duplicate | ----------- |
| Remove | Remove this file from the current Task. The file will still be present on disk. |
| Renumber | reset the sequential numbering of this text file. [ ALT + N] |
| Append/Split | Open the Append and Split dialog |
| Timing | Lists available Timing Options |
| Intervals | |
| Align | |
| Recut | |
| Stretch | |
| Translate | Use one of the external Machine Translation service to translate this file into another language |
| Export File | Use the Export Text File dialog to make a copy of this file, optionally in a different file format, on an external storage location. |
| Open File Location | open Windows Explorer or Mac Finder with the text file selected in its correct folder. – A quick way of finding the file if you need to make a quick copy. |
| File Status | Open the Status dialog for this file. |
| File Properties | Show the Properties of the file selected in the Project Properties dialog. |
| Will give you options to print the script / or the script over video frames. | |
| Widget Help | Open a new tab with the help section for this widget. |
| Settings | Open the settings dialog for this widget. |
| ----------- | ----------- |
| Mix Audio | Open the Audio Mixer window. |
| AD Conversion | Options to convert a text file to an AD File: |
| Create AD file | use the Gap Detector dialog to use a text file (in the current Task) to find gaps that can be used for audio description. |
| Convert from SRT | Create an AD or Dubbing file (srtad, esf or srtdub) |
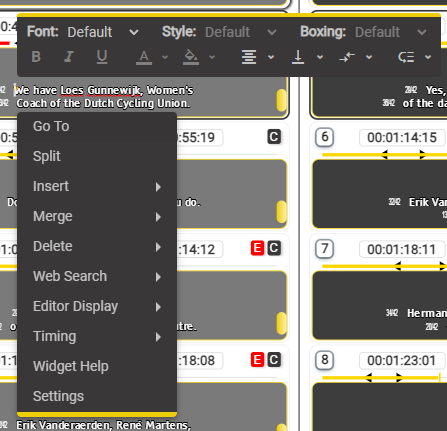
| Inside the Text Edit Box |
|---|
 |
Menu Bar
Options will vary depending on the subtitle file format which is used .
| Option | Description |
|---|---|
 | Toggle between Font1 and Font2 |
 | Toggle between styles |
 | Toggle boxing options |
 | Toggle Bold On/Off |
 | Toggle Italic On/Off |
 | Toggle Underline On/Off |
 | Change Font Colour |
 | Change Text Background Colour |
 | Change Horizontal Alignment |
 - Justify Left/Center/Right - Justify Left/Center/Right | |
 - Align Left/Center/Right - Align Left/Center/Right | |
 | Vertical Alignment |
 - Move Subtitle to top - Move Subtitle to top | |
 - Move Subtitle Up one row - Move Subtitle Up one row | |
 - Move Subtitle Down one row - Move Subtitle Down one row | |
 - Move Subtitle to bottom - Move Subtitle to bottom | |
 | Row Alignment |
 - Justify Row left - Justify Row left | |
 - Justify Row center - Justify Row center | |
 - Justify Row right - Justify Row right | |
 | - Vertical Text Tools |
 - Toggle Subtitle horizontal or vertical - Toggle Subtitle horizontal or vertical | |
 - Add a ruby for selected text - Add a ruby for selected text | |
 - Add emphasis for the selected text. - Add emphasis for the selected text. | |
 - Display selected text horizontally in vertical mode. - Display selected text horizontally in vertical mode. | |
 | Word Move tools |
 - Move first word up a row. - Move first word up a row. | |
 - Move last word down a row. - Move last word down a row. | |
 - Move first word up to previous title. - Move first word up to previous title. | |
 - Move last word from previous tittle to beginning of current title. - Move last word from previous tittle to beginning of current title. | |
 - Move last word to the next title. - Move last word to the next title. | |
 - Move first word of the next title to the end of the current title. - Move first word of the next title to the end of the current title. |
Context Menu
| Option | Description |
|---|---|
| Go To | Open the Go To and Jump dialog. |
| Split | Split the current subtitle in two at the current cursor position. |
| Insert | Insert a new subtitle above or below the current one. |
| Merge | Merge the current subtitle with either the one above or the one below. |
| Note: A warning will be shown if there’s not enough space to insert a subtitle of minimum duration. | |
| Delete | ----------- |
| Current Title - Delete the current Title | |
| Text Only - Delete all the text in the current Title | |
| Delete All - Delete all titles in the active file. | |
| Delete All Before - Delete all titles before the currently selected one in the active file. | |
| Delete All After - Delete all titles after the currently selected one in the active file. | |
| Web Tools | |
| Search Wikipedia | |
| Search Google | |
| Google Translate | |
| Editor Display | |
| Display Mode | |
| Text Only | |
| Dynamic Height | |
| 16:3 - 1/3 Height | |
| 16:9 - Full Size | |
| Adjust Opacity - Adjust the grey level of the text edit boxes to suite your preference. | |
| Note: Save as part of the current Layout | |
| Make sure you Save the Layout | |
| Timing | Lists available Timing Options |
| Align | |
| Recut | |
| Stretch | |
| Intervals | |
| Auto Recut | |
| Widget Help | Open a new tab with the help section for this widget. |
| Settings | Open the settings dialog for this widget. |
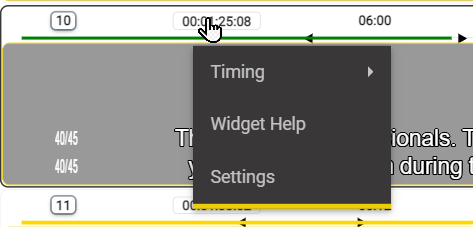
| Timecode Area |
|---|
 |
| Option | Description |
|---|---|
| Timing | Lists available Timing Options |
| Intervals | |
| Align | |
| Recut | |
| Stretch | |
| Widget Help | Open a new tab with the help section for this widget. |
| Settings | Open the settings dialog for this widget. |
Reading Speed Indicators
Each text box in the Subtitle Editor has a Reading Speed Indicator above the text box.
The black triangle markers show the range of acceptable reading speeds based on the current text, the timecode duration and the configured reading speed.

If the reading speed is within the markers the timebar will be Green
If the reading speed is too fast or to slow the timebar will fall outside the markers and be Red or Yellow.
The small vertical line (green) indicates the In time of the next subtitle and so the limit to which the out time of the current subtitle can be set.
The Reading Speed value is configured in the Settings Template.
Hotkey & Mouse Actions
There are a range of hotkeys specific to the Timed Text Editor Widget. For a list see the Timed Text Editor section of the Hotkeys page.
For time-code editing hotkeys see the time-code section of the Hotkeys page.
There are a range of mouse actions specific to the Timed Text Editor Widget. For a list see the Timed Text Editor section of the Hotkeys page.

Double clicking on the Subtitle ID will jump the media to the in-time of the selected subtitle.
Shift double clicking on the ID will jump the media to the out-time.
Right Click in widget area – Open widget specific context menu.
Click in the text area to edit the text.
Alt+ Right click in widget area – Open widget specific Settings dialogue.
Settings
| No. | Option | Description |
|---|---|---|
| 1 | Widget’s Name | Allows the user to set the name of the current widget. |
| 2 | Time Format | Sets the display format for this Widget. |
| HMSF – Hours Minutes Seconds Frames. | ||
| HMST – Hours Minutes Seconds Thousandths. | ||
| ST – Seconds and Thousandths. | ||
| F – Frames. | ||
| 3 | Text Display Mode (only for subs) | Allows the user to set the text display mode. |
| Text Only | Text box will be the height of the text. | |
| Dynamic Height, full width | Text box height will be dynamic and full width. | |
| 16:3 - 1/3 height, full width | Text box height is 1/3rd of the screen height. | |
| 16:9 - Full Size | Full size text box 16: 9 aspect ratio | |
| 4 | Show Reading Speed Bar | Toggle on/off the reading speed bar. |
| 5 | Show font Number (1 or 2) per row | Toggle on/off Font Numbers |
| 6 | Editable | Allows the user to set the editing permissions for this file. |
| All | Full editing allowed | |
| Times only | Use when adjusting the timing or conforming a file so the user can’t edit the text by mistake. | |
| Text, Style and Position | Text, text styles (colours, italic…) and position (horizontal and vertical) can be edited | |
| Times and Text Only | limits the level of editing available | |
| Text Only | Only text content and comments (but not Insert, Delete, Split or Merge or text style) – ideal for translators working from a template. | |
| Comments Only | Great for getting feedback from clients. | |
| Read Only | Nothing can be edited – Great for reference files that shouldn’t be changed – EG original language ‘templates’. | |
| 7 | Default Number of Columns | Allows the user to set de default number of columns available. |
| 8 | Place Over Video | Shows this instance of the widget over the video player. |
| 9 | Timecode Display | Sets the location of the Timecode UI |
| No | No timecode on any of the columns. | |
| Left Column Only | If multiple columns are presents, will appear on the left most columns. | |
| All Columns | Appears on all columns. | |
| 10 | Reading Speed Display Position | Sets the position of the Reading Speed Display |
| None | Reading Speed Display is hidden. | |
| In reading speedbar |  | |
| In text box - top right |  | |
| In text box - bottom right |  | |
| 11 | Show character count per row | Toggle on/off character count per row. |
| 12 | Protect Text | Allows you to toggle on/off the protection level for the current file |
| 13 | Editor Background Alpha (%) | Adjusts the grey level of the text edit boxes to suite your preference. |
| 14 | Enable seek video to title by clicking in the text | Toggle on/off seek video to title by clicking in the text. |
Subtitle Actions
You can right click on the number in the top left side of each subtitle text box to open the context menu.
| Option | Description |
|---|---|
| Mark | - marks a title. You can also use right click on the title number or Alt+a to mark the current active title |
| Unmark All | - unmarks all title which have been marked. |
| Copy Marked | - copy all the title which are marked |
| Cut Marked | - cuts all the titles which are marked |
| Paste | - pastes all the title which were copied/cut |
| - After selected - will paste after the currently selected title | |
| - At media time - will paste at the current media time | |
| Timing | - just like the Timing Tools which can be accessed through Tools → Timing Tools |
| Widget Help | - will open help for the Time Text Editor Widget |
| Settings | - will open the setting window. |