Audio Tools Plugin
Audio Tools
The Audio Tools widget adds a new option on the Tools menu
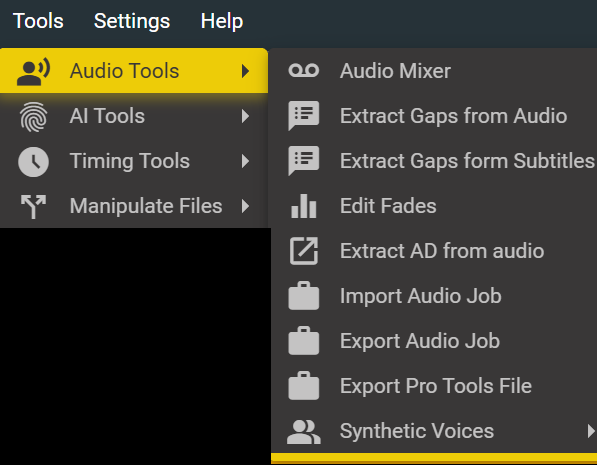
Audio Mixer
Add a link to the audio mixer in the Audio Tools section.
Extract Gaps from Audio/Subtitles
Audio Tools → Extract Gaps from audio file or Extract Gaps from Subtitles
Stellar provides Gap Extraction feature which can automatically create an AD file which detecys the gaps in the dialog. There are two ways in which gap detection can be done: using Automatic Speech Recognition or a Subtitle/Transcript file.
- Detect gaps using - allows you to set the method of gap detection.
- If ASR - Select Language - Allows you to set the language of the ASR engine.
If File - Select Text file - Select your subtitle or transcript file.
- Minimum Gap size (seconds) - You can set the minimum length of the silent interval you want to be identified as a gap. (e.g. If you set this to 1 - then all the silent intervals which are larger that 1 second will be detected as gaps.) - defaults to 2 seconds.
- Minimum Interval between the AD and original (seconds) - You can set the minimum interval between the end of the dialogue/speech and the start of the AD line. - Defaults to 0.08 seconds.
- Set output File Name and Location - Allows you to select the location and the name of the output file. - output will always be an .srtad file.
Click on the "Extract Gaps" button. - This will run a background process and then add a new AD file to the current task.
Edit Fades
The fade effect applies to the original audio not the ad track.
Tools → Audio Tools - Edit Fades - Will open the General Fade Editing Settings.
Or - Right click on the fade UI element. - Will open the Fade Editing Settings window for the current fade.
Each audio clip in an AD file has an associated fade setting, this controls how much, and when, the program audio will be faded down during the AD audio. The fade metadata will always be written in the .srtad/.srtdub file.
The UI element for the Fade Data looks like this:

And is positioned in the fade band that is present between the Script Band and the Audio Band on the timeline.
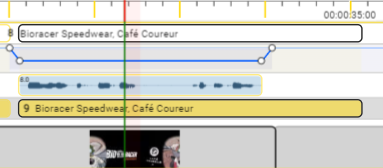
Each fade has 4 round handles which can be moved around in order to alter the fade effect. ! In the case of ESF files - the fade start and end markers handles cannot be moved outside the confines of the box.!
Right click on the fade you want to edit → then select Edit Fades
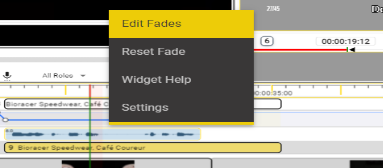
This will open the Edit Fade Settings Window
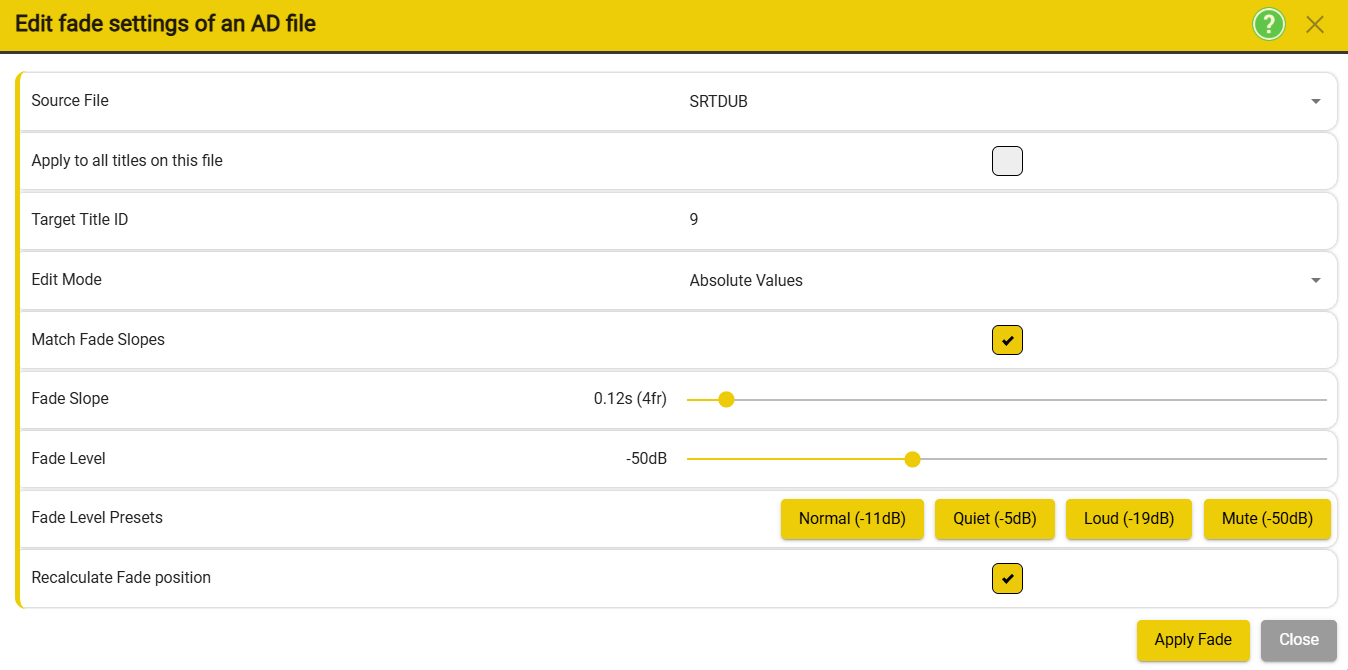
- Source file - Allows you to select which Audio Description or Voiceover file you want to set/write the fade data in - Defaults to the current selected file in the Subtitling Widget
- Apply to all titles of this file
- if checked - Stellar will set all the fades in the existing file to the same settings.
- unchecked - only the currently selected fade will be changed.
- If only one fade is being edited - then the Target ID Title of the title corresponding to fade will be shown here.
- Edit Type - Allows you to select the way in which the fades will be changed.
-
Absolute Values - set the fade(s) to the values set in dB and seconds
- Absolute Fade Level (dB) - sets the absolute fade level in dBs. From -50dB to 0dB.
- Fade Slope - sets the slope of the fade in seconds. From 0s to 2s.
-
Relative Adjustment - change fade(s) by a relative amount in dBs
-
Recalculate fade - will recalculate the times of the selected fade(s) to match the current audio clips.
- Fade Slope (seconds) - See point 3 - Absolute Values
- Absolute Fade Level (dB) - See point 3 - Absolute Values
- Fade double presets - select one of the predefined levels. Quiet and loud refer to the levels of programme audio.
- These default levels can be set in the audio sectrtion of the Style Profile.
- Recalculate fade position - recalculates the fade position to match the current audio clips.
**Controls **
- Apply Fade - Will apply the current settings to the fade(s).
- Close - Exit the window without saving.
Fade Handle Tutorial

Each fade contains 4 handles:
a - start marker
d - end marker
b - fade in end marker
c - fade out start maker
Moving the Markers - the markers can be move by holding Shift and Left Click Dragging them
There are two types of movement that can be done with a selected marker.

Up - Increases the Volume
Down - Decreases the Volume
Left - Reduces the length of the fade
Right - Increases the length of the fade
Setting the start of the fade interval - move the a handle (start marker) left or right
Setting the end of the fade interval - move the d handle (end marker) left or right
Setting the end of the fade in interval - move the b handle (fade in end marker) right or left
Setting the start of the fade out interval - move the c handle (fade out start marker) right or left
Set the volume maximum point of the fade in interval - move the b handle (fade in end marker) up and down
Set the volume maximum point of the fade out interval - move the c handle (fade out start marker) up and down
Extract AD from Audio
Stellar allows the user to extract Audio Description from an AD audio file. This process can recreate an AD file (ESF or SRTAD) from an Audio Description audio track by detecting the silence between the audio segments.
The original AD track must be an AD voice only track without any program audio.
Tools → Audio Tools → Extract AD from Audio
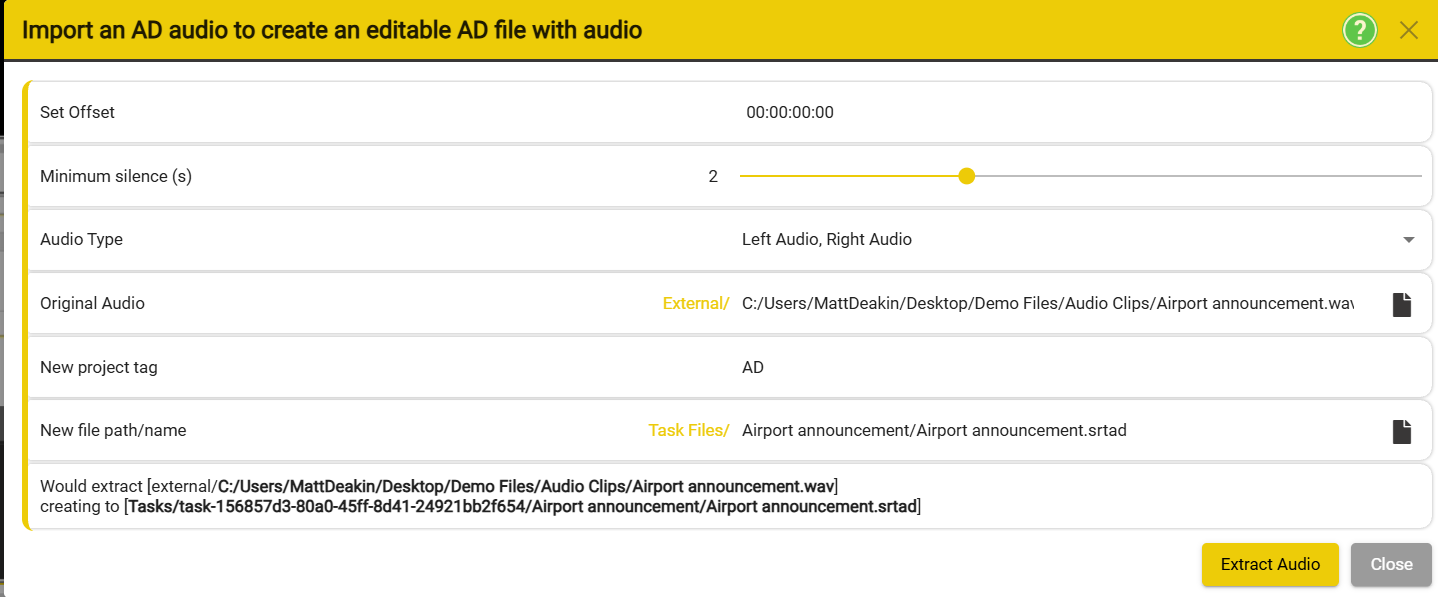
- Minimum silence(s) - You can set the minimum time in seconds that will be detected as a separate audio segment.
- Audio Type - select from the drop down menu. - You need to know what format the Audio file contains.

- Original Audio - Allows you to select that original Audio File.
- New Project Tag - Set the tag of the new file. This appears at the top of the text column and on the row on the timeline.
- New file path/name - Allows you to select the location and the name of the output file. - The default will be a new file in the current Task.
**Status area **
- This area give explanation about how the previously set settings influence the Audio Description Extraction process.
**Controls **
Extract Audio - Starts the Audio Extraction process.
Close - Close the window without saving.
Import Audio Job
Isn't this covered elsewhere?
An Audio Job consists of the script file (srtad, esf, srtdub or TTAL) and any associated audio files (wav) combined in a single Zip file.
Tools → Audio Tools → Import Audio Job
Or
Files → Import → Audio Job
- Import File - Allows you to select the files that will be imported.
- Destination Folder - Allows you to set the destination folder.
- Create New Project - If checked, the import process will create a new Project. Else, it will import the Audio Job into the current project or Task.
- Display Name - This sets the text shown at the top of the text column and on the timeline track for this AD or Dubbing file.
- This area gives an explanation about how the previously set settings influence the Audio Description Extraction process.
- Import Audio Job - Imports the Audio Job using the previously chosen settings.
- Close - Close the Import Audio Job window
- Help - Opens up the corresponding help page.
Export Audio Job
Isn't this covered elsewhere?
An Audio Job consists of the script file (srtad, esf or srtdub) and any associated audio files (wav) combined in a single Zip file.
Tools → Audio Tools → Export Audio Job
Or
Files → Export → Audio Job
- Select AD file to Export - Allows you to select which AD file you want to export. This will default to the first AD or Dubbing file in the current Task (normally there would be only be one).
- Destination File - Allows yo to set the Path/Name of the exported file.
- Include all audio files :
- Checked by default - All audio files will be included in the Audio Job Zip export.
- Unchecked - Another UI element will appear under the Include all audio files element
To select the date, press on the Calendar icon in the right side. This will open the Calendar an allow you to search and input the correct date.
Only the files that were recorded after the selected date will be included in Zip file. This feature is useful when you are required to send updates, rather than the entire Task.
- Include all takes
- If checked it will include all the Takes in the Zip File, even the ones which are marked as muted.
- If not check, only the Takes which are active / market as unmuted will be included in the Zip File.
- This area gives an explanation about how the previously set settings influence the Export Audio Job process.
Synthetic Voices
###Add link to synthetic voices widget page.
Export Pro Tools File
Isn't this covered elsewhere?
Stellar offers the option to Export to a Pro Tools file - A Pro Tools Project consists of the audio files (wav) and associated metadata combined in a single .ptx file. This is the best method of exporting audio and timing information from Stellar to Pro Tools.
File → Export → Pro Tools File
Or
Tools → Audio Tools → Export Pro Tools File
- Source File - Allows you to select the file that will serve as a source for the Export process.
- Destination File - Allows you to set the path/name of the exported file.
- Export Audio Clips - Two options can be selected from the drop-down menu.
- All Clips – will include both enabled and disabled/muted Takes
- Active Clips will only include active/unmuted Takes
- This area gives an explanation about how the previously set settings influence the Export Audio Job process.
- Export - Starts the export process using the details from point 4.
- Close - Closes the export window.
- Help - Opens the coresponding help page.