Stellar Client Portal
The Stellar Client Portal gives clients and client groups access to a range of actions.
If you have been added to a task — either individually as a client, or as a member of a client group — you can use the portal to:
- Upload media assets to a task.
- Download media assets from a task and save them to your device.
- Review the status of a task.
- Review a task and either Approve or Reject with comments.
- Search and filter your task list to find the tasks that are relevant to you.
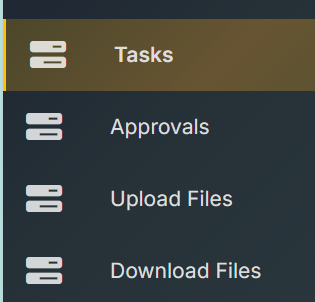
You may not see all of the tabs. This is configured by the company providing the services.
Tasks
Clients can see a list of all their tasks currently being worked on and their status.
To view your tasks:
- Open the Stellar Client Portal.
- Select Tasks in the left-side toolbar.
The Tasks view lists the tasks being worked on for your company that have been tagged for you.
This view is read-only and is just for your information so you can track the progress of tasks.

Uploading and Downloading Files
The Client Portal is used to move media assets both ways: you can supply source files for a task, and you can take final delivery of completed files
Uploading Files
Use Upload Files to add media asset files to a task.

To upload assets:
Select Upload Files in the left-side toolbar.
- You will see a list of all the tasks awaiting upload.
Select the task to upload assets to and click on the Upload button 
Choose the media asset files you want to upload from your device either by dragging and dropping or browsing.
Choose the media asset files you want to upload from your device either by dragging and dropping or browsing.
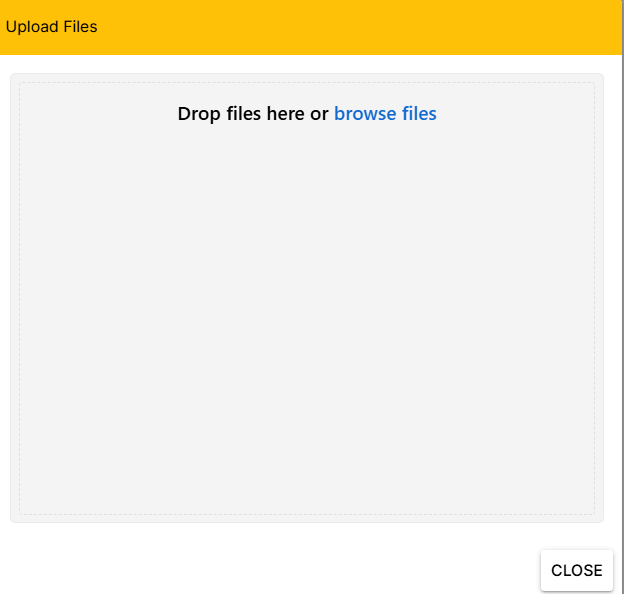
- You can add multiple files.
- Click on the Upload button
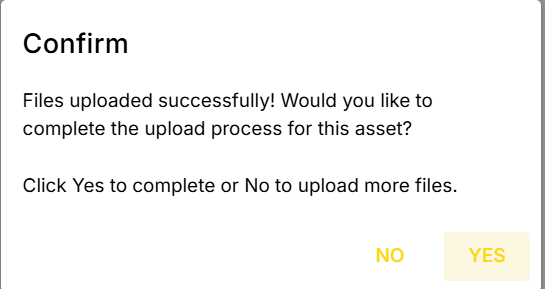
Once the upload is completed you will get a confirmation pop-up
. 
.
- Yes - to complete uploading
- No - to wait and add other uploads later.
Confirm the upload.
- You can also mark the uploads as completed by clicking on the Completed button

Once marked as completed, the task will disappear from the uploads tab.
Once marked as completed, the task will disappear from the uploads tab.
Tips for uploading:
- Keep the upload window open until the upload has finished.
- Check the task after uploading to confirm that all expected assets are listed.
Downloading Files
Use Download Files to download media asset files from Stellar to your own device.
To download assets:
- Select Download Files in the left-side toolbar.
- Select the task that contains the assets you need.
- Select the media asset files you want to download.
- Confirm the download and choose where to save the files on your device.
Saving and Reviewing Downloaded Media Locally
Downloading takes a copy of a media asset out of Stellar and stores it locally on your device. Once the file has been saved locally, you can:
- Open it in your preferred local media player or application.
- Review the media offline, without needing to be signed in to the Client Portal.
- Keep the file for your own records, in line with your organisation's storage and retention practices.
Downloading an asset does not remove it from Stellar. The original asset remains attached to the task.
Approvals
Use Approvals to review the work that has been submitted for a task and to approve it when you are satisfied with the result, or reject with feedback.

To review and approve a task:
Select Approvals in the left-side toolbar.
Select the task you want to review and click on the View button  This will open the approvals media player.
Select the task you want to review and click on the View button This will open the approvals media player.
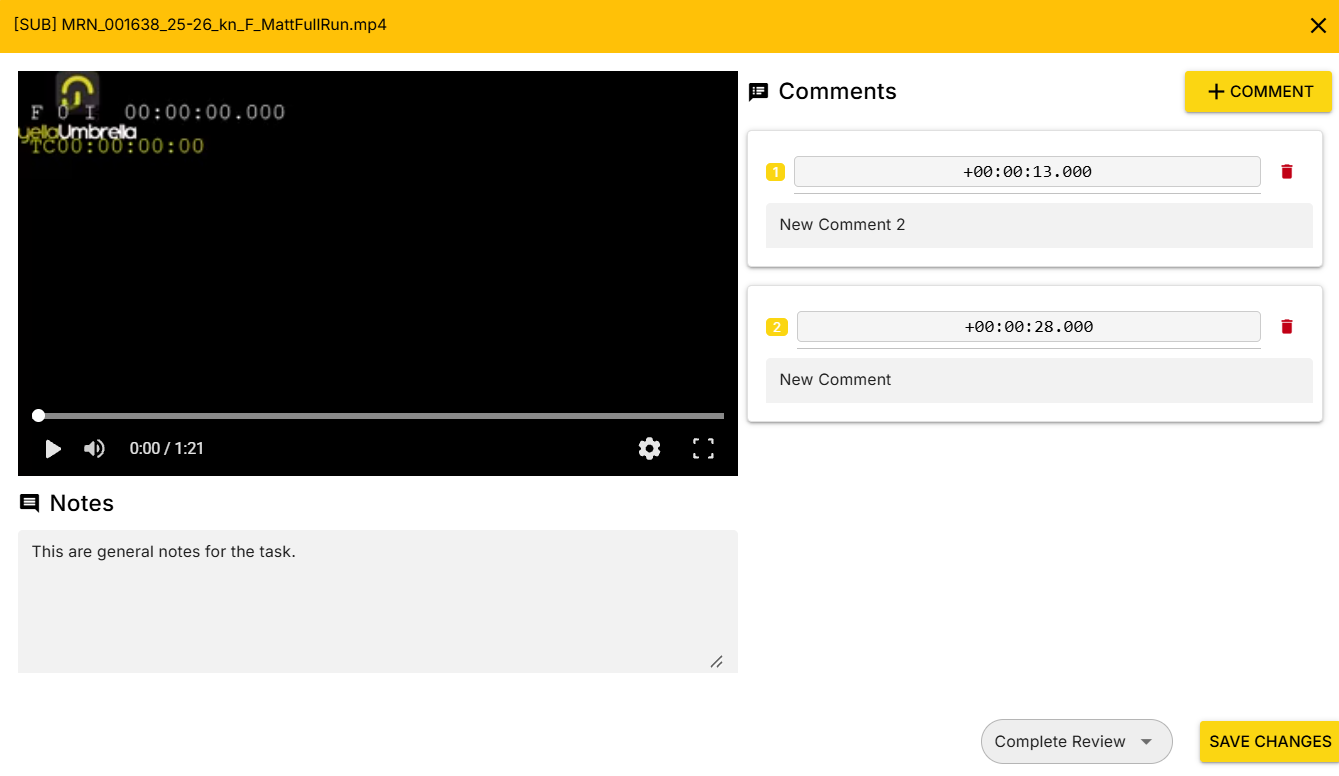
Use the media player to see the subtitles or listen to the AD or dubbing audio.
You can either add overall feedback in the notes area.
Use the media player to see the subtitles or listen to the AD or dubbing audio.
You can either add overall feedback in the notes area.
Or individual timed comments :
- At any timecode: You can add a comment by clicking on the + comment button.
- Then add any feedback comments in the text box.
- You can add as many timed comments as you want.
- At any time you can click on "Save Changes" and come back to the process later.
Once you have reviewed the video, you can either reject it with notes and comments or approve it.
Once you have reviewed the video, you can either reject it with notes and comments or approve it.
Click on the Complete Review button.
Click on the Complete Review button.

- The options available will depend on the workflow but you can normally either Approve or Reject.
Approve the task when you are satisfied with the work.
Approving a task confirms to the team working on it that the delivered work meets your requirements.
A rejected task will go back to the supplier with all your notes and comments.
Searching and Filtering Tasks
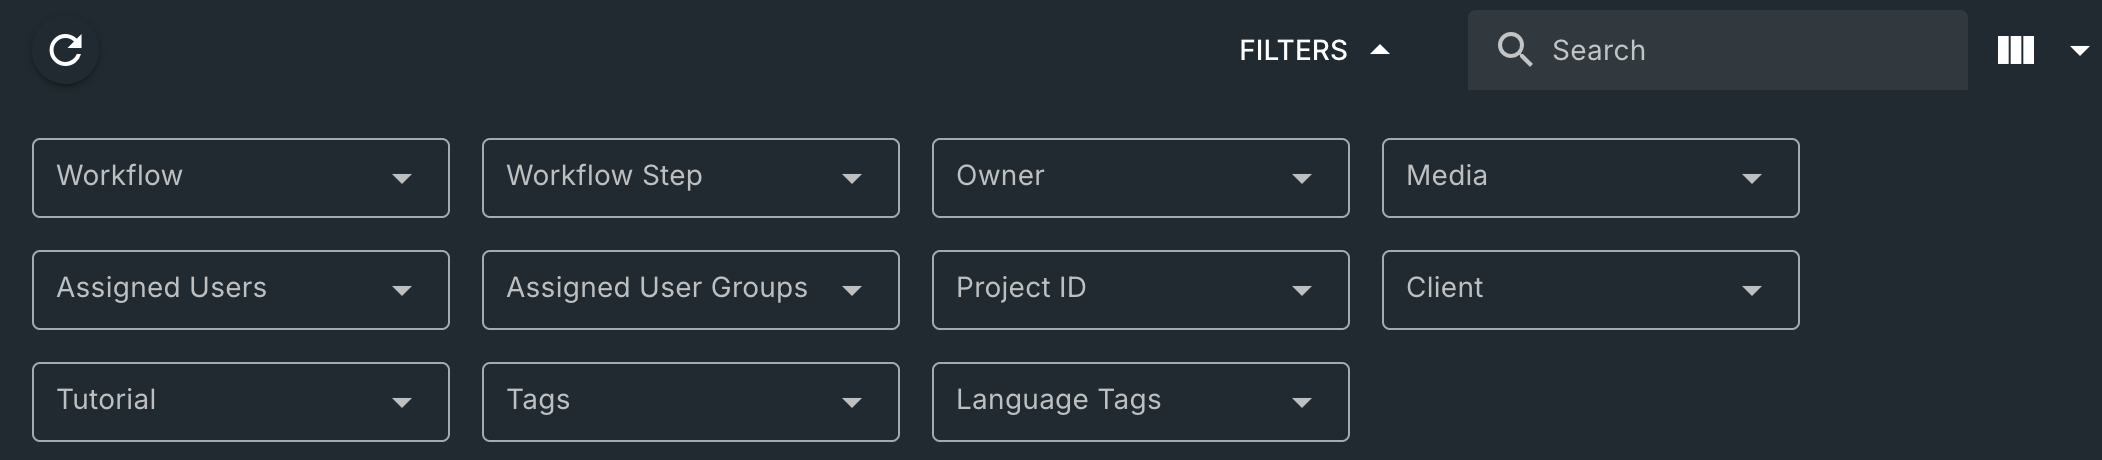
The Client Portal provides search and filter controls above the task list, so you can narrow a long list down to the tasks you need.
Searching
Use the Search field at the top right of the task list to search for a task. Enter your search text in the field to narrow the list to matching tasks.
Filters
Select FILTERS to show or hide the filter options. The following filters are available:
| Filter | Description |
|---|---|
| Workflow | The workflow a task belongs to. |
| Workflow Step | The step a task has reached within its workflow. |
| Owner | The owner of the task. |
| Media | The media associated with the task. |
| Assigned Users | The individual users assigned to the task. |
| Assigned User Groups | The user groups assigned to the task. |
| Project ID | The project identifier associated with the task. |
| Client | The client the task belongs to. |
| Tutorial | The tutorial value associated with the task. |
| Tags | Tags applied to the task. |
| Language Tags | Language tags applied to the task. |
Each filter is a dropdown. Select a filter, then choose the value you want to filter by. Filters can be combined — for example, you can filter by Client and Workflow Step together to see only the tasks for one client that have reached a particular stage.
Additional Controls
- Refresh — Select the refresh icon at the top left of the task list to reload the list with the latest information.
- Column options — Use the column control to the right of the Search field to adjust how the task list is displayed.
Why Filtering Helps
Filtering is the quickest way to find relevant tasks when you have access to a large number of them. For example, you can:
- Use Workflow Step to see only the tasks that have reached a particular stage.
- Use Tags or Language Tags to group related tasks together.
- Use Project ID to bring up every task belonging to a single project.