Importing Text Files
You can add a text file to the current Task or Local Project with or without a format conversion.
Text files include subtitle, caption, AD and dubbing Scripts and other timed text file formats.
You can Import a file from any location visible on your PC or Mac and a new file (in the selected format) will be stored in your Task or if a Local Project under the \Stellar\Files folder. See File in Stellar for more information on how and where files are stored in Stellar.
Watch the Importing and Editing Subtitle tutorial for a video walkthrough of how to import a subtitle file.
The new file will become part of the current Task.
You can select to import all the contents of the file, the timing information without the text or just the text without the time stamps.
In the case of AD and Dubbing files you can import with or without the associated audio files.
File → Import → Text File
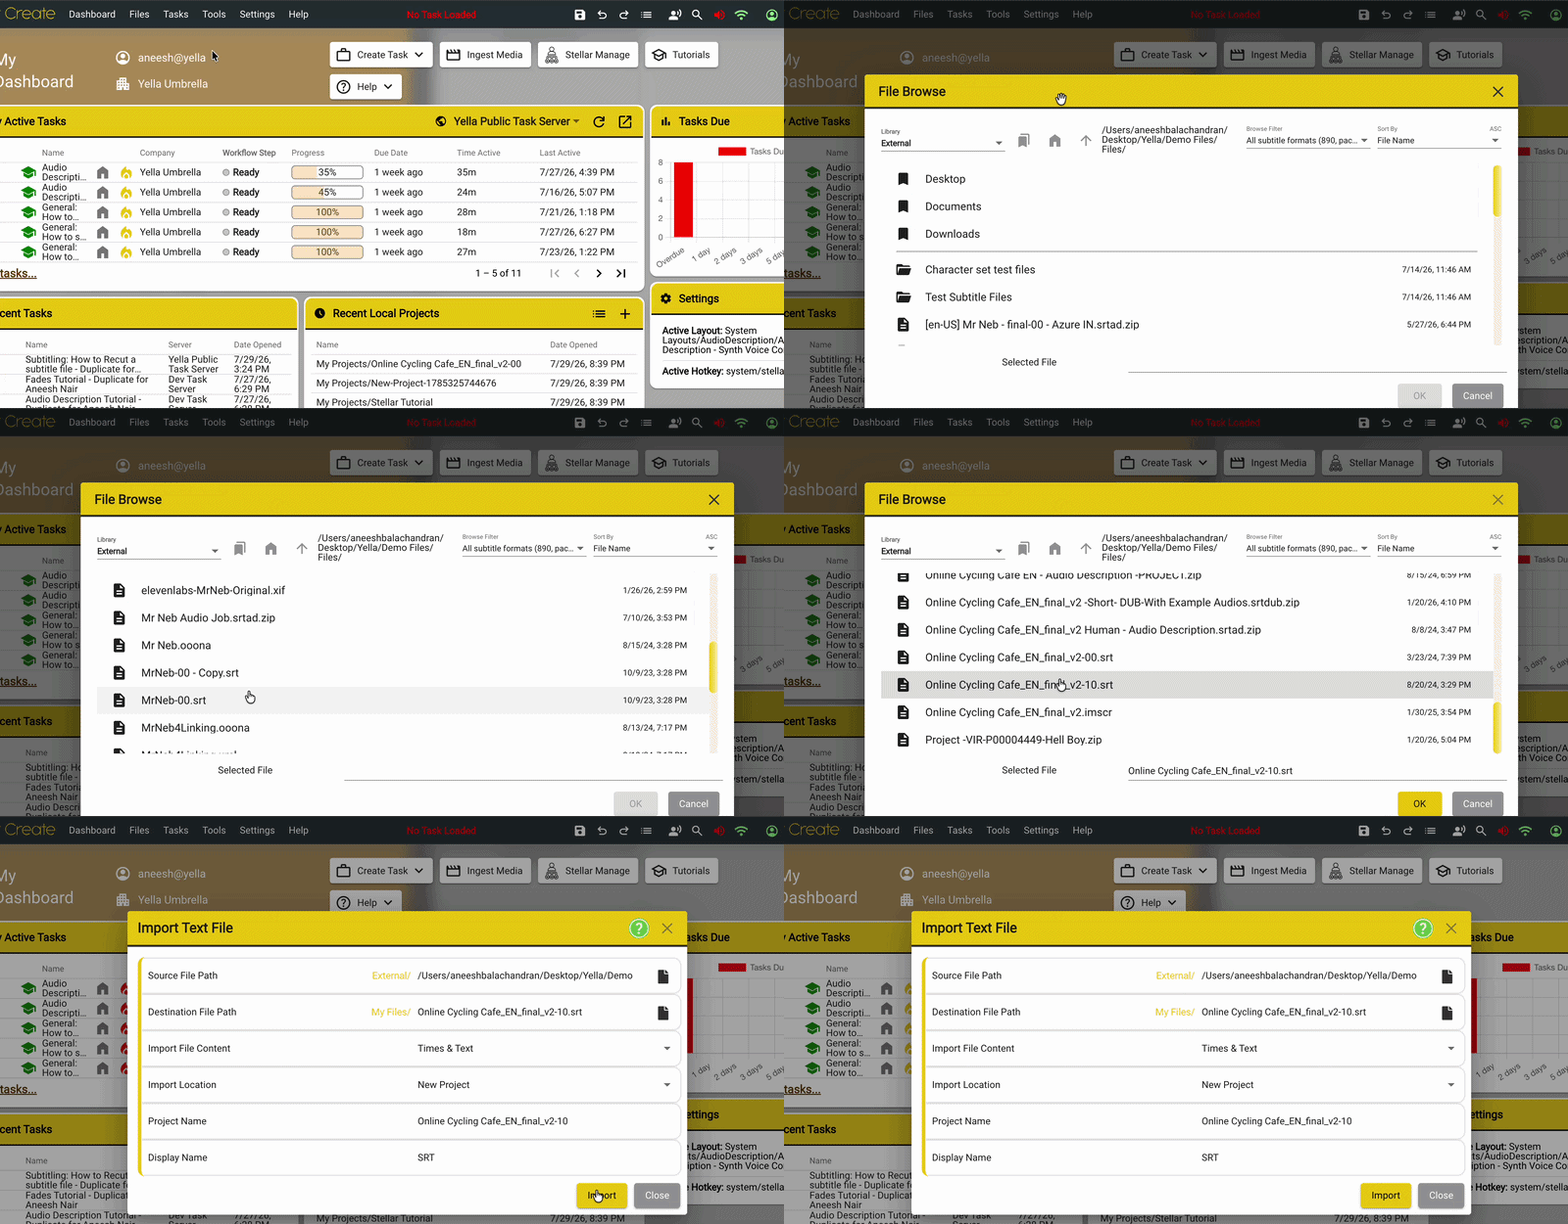
This will open the Import Text File
1. Source File Path - Allows you to browse to the path of the file you want to import.
2. Destination File Path - Shows where the imported file will be stored. You should not change the destination file path unless you know exactly what you are doing.
- If you want to convert the file to a different type you can select between the standard Internal file types. These are the types that can be edited within Stellar.
-
Subtitles – STL, SRT, PAC, FPC & IMSC-Rosetta, 890, ASS, LAMBDACAP, ooona,
-
Audio Description -ESF, SRTAD
-
Dubbing - SRTDUB, TTAL (Netflix)
-
note
-
For AD and Dubbing files you MUST create a new sub folder for each file. This is to keep the audio WAV files for this Audio Job separate from other wav files for other jobs.
3. Create New Project - Check this if you want to create a new Local Project.
4. Project Name - Allows you to set the Name of the project. If Create new project is selected.
5. Display Name - Allows you to set the Display Name, it can be different than the actual Project Name.
6. Import Mode - Allows you to select the Mode of the Import process.
- Import All – the new file contains all the text and timing information from the source file.
- Import Times Only – The new file only contains blank subtitles. This is useful for creating a blank template when translating between languages
- Import text only – the new file contains text subtitles but no times. – this is useful if a file needs to be retimed.
The new file will be added as the last column in the current Task.
- It is possible you will need to use the drop down selector in the last tab to see the new file, depending on the number of files in your Task.
Import Script File
A Script is a text document that contains timing, text and possibly other information. Scripts come in a huge range of styles and file formats from text files, Word documents or Spreadsheets, each with a different layout.
To Import a Script, first it must be edited and saved as a CSV file in a set format. This is best done with text and spreadsheet editing tools such as Word, Excel, Google Docs and Google Sheets, or any other editing tool.
Save the Script as a .csv file (from Excel or Google Sheets) in this format:

Column A - Serial Number 1,2,3… Optional
Column B – **TC In **(In Timecode) - Stellar will do its best to interpret this information. The script editor supports a range of timecode formats and these are interpreted as follows:
- Blank – a basic sequential timecode will be calculated from the Start Timecode set and with in and out cues calculated based on the word count and reading speed set.
- 0000000 = Frame count
- 0000000.000 = Seconds and milliseconds (1 to 3 decimal places, dot and comma separators supported.
- 00:00:00:00 = hh:mm:ss:ff at 25 Fps
- 00:00:00;00 = hh:mm:ss;ff at 29.976 Fps
- 00:00:00 = mm:ss:ff at 25 Fps
- **00:00;00 or 000:00;00 **= mm:ss;ff at 29.976 Fps
- 00:00 or 000:00 = ss:ff at 25 Fps
- 00;00 or 000;00 = ss;ff at 29.976 Fps
Column C – **TC Out **(Out Timecode) – Optional - If missing Stellar will use the set Reading/Speaking speed and the In time to calculate an out time.
Column D – Clean Text – used for the subtitle or AD/Dubbing script
Column E – Role – only used for Dubbing Scripts. - Sets the Role or Character name for each Title.
Columns F-H – Additional Text – Stored as Comments for each title. These can include speaking directions etc. or translations
File → Import → Script
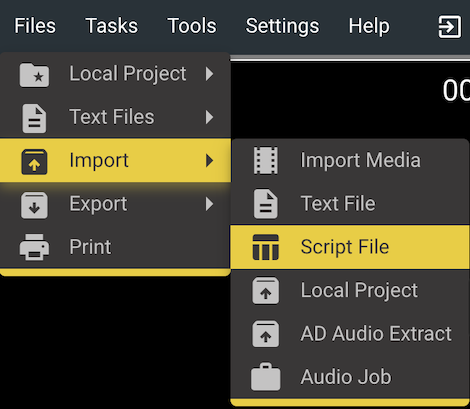
- Input File - Selects the source file, must be in the .csv format set out above.
- Output File - Set the new file to be created from the script.
- Select the location and set the file name
- Select the file type
- Subtitle .srt or any other supported subtitle format – Subtitle File – No Role information will be stored and the file can’t be used to record audio.
- AD .srtad – Audio Description file – No Role information will be stored but can used to record audio.
- Dub .srtdub – Dubbing script file – Role information will be stored, Text adaptation is supported, audio can be recorded.
- Set start Time – Force the time of the first subtitle to be in the range selected.
- No change uses just the times in the subtitle file.
- Hint – Use the Align or Recut tools to change the timecodes after importing the script.
- Set Reading Speed – Used to calculate Out timecodes if there are one in the file.
- Timecodes can be easily edited on the timeline after the script has been imported.
- Timecode Frame Rate – Stellar will attempt to work out the timecode frame rate from the file. You can override this by setting a frame rate here.
- Add Script to Current Task – If set the new file (srt, srtad or sdtdub) will be added to the current Task. If not the file will be stored to disk only.
- File Title: the text Title that will be displayed on the timeline and in the subtitle editor for the new file.
- Import – Click to start the import.
- Close – Closes the Import Script window.